Sunday, January 23, 2011

Recipe: Monkey Muffins


I have had this recipe in my "to make" file for a couple of months now.  And now that I have made them, I am sorry that I waited so long to make them.  They are so good that I have made them for my family several times.  I haven't made them with whole wheat flour as of yet, but I will be soon.  My girls love these for breakfast, in their lunch box or for an afternoon snack.  But, to be honest, they really love them whenever they can get their hands on them.  Hailey likes to have one for breakfast with homemade yogurt.  I am glad that my girls are eating more nutritious homemade food and less commercial food with preservatives

Enjoy!


Monkey Muffins
(recipe from And Baby Makes Five)
{print}


1/2 cup butter, softened
3/4 cup sugar
2 eggs
1 cup mashed ripe bananas (about 3)
2/3 cup creamy peanut butter
1 T skim milk
1 tsp. vanilla
1 1/2 cups all-purpose flour
1/2 cup whole wheat flour
1 tsp. baking soda
1/2 tsp. salt
3/4 cup mini chocolate chips (I have used chocolate, white chocolate, etc)

Preheat oven to 350ยบ. In a large bowl, beat butter and sugar together until light and fluffy. Beat in eggs until combined and then beat in bananas, PB, milk and vanilla. Combine dry ingredients in a separate bowl and add to wet, stirring until just combined. Fold in chocolate chips. Spoon batter into greased muffin cups. Bake mini muffins for 14-16 minutes and larger ones for 22-25 minutes. Allow to cool for 5 minutes before removing from pans.


Linked To:
  * Not So Homemade:  What's Cooking Wednesday
  * Simply Sweet Home:  Friday Favorites
  * Balancing Beauty and Bedlam:  Tasty Tuesday

Thursday, January 20, 2011

Project Idea: Printable School Valentines

Photo by One Charming Party

So stinkin' cute!  I love these Valentine cards created by One Charming Party.  Better yet you can download them for free!
Photobucket

Project Idea: Conversation Heart Bags

Photo by Simply Feather

There are so many cute ideas floating around blogland for Valentine's Day, but this has to be one of the cutest.  I love the idea of these stuffed with some candy for classroom Valentines.  Simply Feather has the complete tutorial on her blog.
Photobucket

Wednesday, January 19, 2011

Project Idea: Valentine Mailbags just like PB

Photo by Our Scoop

I have coveted the Valentine Mailbags in the Pottery Barn catalog since they were introduced a couple of years ago.  I could never justify spending that kinds of money and sadly you can no longer get them at PB. I have seen a few listed on eBay and they go for big bucks.  I am so excited to say that I finally find a cute DIY from Our Scoop.  They are so cute and she has the pattern and tutorial on her blog.  I am hoping to convince my mother to help me out with these.  It looks basic enough that even I can do it....with so help!
Photobucket

Gifts From My Kitchen: Peppermint Fudge Cupcake Jars


Right before the holidays, I was reading through one my absolute favorite blogs, Our Best Bites, looking for teacher's gifts to make and came across this...cupcakes in a jar!  I know right?  Can you believe it?  How stinkin' cute are they and so different?  And really very easy.  They were a hit.  Not only did they taste good but they were so pretty.  While these were made for Christmas, why not for Valentine's?  I could not find the wide mouth jars anywhere in my town, so I used what I had on hand, the regular size jars.  I didn't have any problems with the size difference.  I was able to find Andes candy in red and white bits that was perfect as a topping.

I made the decorating simple.  I covered the top of the jar with the lid and put a cupcake liner upside down and flattened the bottom of the liner and then screwed the ring over the liner.  Instant and easy! 

You really REALLY need to give these a try.  Perhaps for your Valentine!

Enjoy!


Peppermint Fudge Cupcake Jars
(recipe from Our Best Bites)
Makes approximately 8 jars or 12 Cupcakes

Cupcakes (cake base for this dessert adapted from Shelly Kaldunski)
2/3 cup all-purpose flour
2 1/2 tbsp unsweetened cocoa powder
3/4 tsp baking powder
1/4 tsp salt
3 oz chocolate, chopped. (or abt 1/2 C chips) Use bittersweet, dark, or semi-sweet.
1/2 C + 3 tbsp real butter, cut into pieces
3/4 C plus 2 tbsp sugar
3 large eggs, at room temperature
1 tsp vanilla extract

8 8oz wide mouth mason jars (or regular if you can't find wide mouth)

Preheat oven to 350 degrees. Place the chocolate and butter in a large heatproof bowl and microwave in 30 second intervals, stirring after each, until melted and smooth. Set mixture aside and let cool 10-15 minutes. In a separate bowl, whisk together the flour, cocoa powder, baking powder and salt. Using a wooden spoon (don't use an electric mixer) stir the sugar into the chocolate mixture until combined. Stir in the eggs one and a time, beating with your spoon until combined after each addition, and then beat in the vanilla. Gently fold in the flour mixture just until no traces of flour remain; do not over mix.

Place the mason jars on a cookie sheet. Divide the mixture evenly among the 8 jars (no need for greasing the jars) or 12 cupcake liners if you're going that route. The jars should be about half full or a little less. Bake until a toothpick inserted into the center of the jar comes out with only a few moist crumbs attached 22-25 minutes. Remove from oven and carefully (with a pot-holder!) transfer jars to a cooling rack. Let jars cool till at least close to room temperature before topping with ganache.


Peppermint Ganache
4 oz semi-sweet chocolate (chocolate chips are fine)
1/2 C heavy cream
1/4 tsp peppermint extract

Place chocolate chips in a bowl. Heat cream in microwave until bubbles form around the outside. Pour in bowl over chocolate chips and immediately cover bowl with plastic wrap. Let sit for 5 minutes, add peppermint extract and then whisk until smooth. Let cool uncovered until thickened slightly, almost like a thin pudding.

To assemble, pour 1 1/2-2 Tbs ganache over the top of each cupcake jar. If desired, use a paring knife to first hollow out a well in the middle of the cake. Tilt jars to distribute ganache evenly over the top of the cake and then let cool for the ganache to set. If storing overnight, place lids and rings on jars and leave at room temperature.

Frosting
3 tbsp flour

1/2 cup milk (whole milk is best)
1/2 cup real butter
1/2 cup sugar (that's granulated sugar, not powdered sugar)
1 t vanilla extract
1/2 tsp peppermint extract

Whisk together the flour and the milk. Heat in a small sauce pan on medium heat. Whisk continuously until it starts to thicken. Let it cook, while stirring, until you can start to see the bottom of the pan. It should still be liquid-ish.  It's okay if you have lumps, because we're gonna strain those out right now. Place the mixture in a mesh strainer and stir with a rubber spatula to push it through. You should end up with a nice, smooth mixture. It's almost like pudding before it's set.

Put this mixture in the fridge and let it cool completely, it's fine if it stays in there long enough to get chilly, you just don't want it warm at all. When it is chilled, you can move on to the following step.

In an electric stand mixer, beat the butter and the sugar for a minute or two until well combined and fluffy. You'll want to use the whisk attachment on a stand mixer, not the flat paddle. Then while beating, add in the thickened
milk mixture and the vanilla. Beat to combine and then scrape down the sides. Don't be scared. It's going to look like a goopy mess and kind of lumpy and separated.  Beat on med-high for 7-8 minutes. After 7-8 minutes it will have transformed from that sloppy mess into something gorgeous, fluffy, and incredibly light and silky.

(See instructions on the Our Best Bites blog for creating a red and white striped look.) Pipe frosting on each jar, being careful to leave room for the lid. If desired, sprinkle on some crushed candy canes or candies and then screw on jar lids.


Linked To:
  * Blessed with Grace:  Tempt My Tummy Tuesday
  * It's A Blog Party:  Delicious Dishes
  * A Beautiful Mess:  Wordless Wednesday
  * All the Small Stuff:  Tuesdays at the Table
  * Not So Homemade:  What's Cooking Wednesday
  * From my tiny kitchen:  Gold Star Wednesday
  * We are THAT Family:  Works for me Wednesday
  * Simply Sweet Home:  Friday Favorites
  * Prairie Story:  Recipe Swap Thursday
  * Mommy's Kitchen:  Potluck Sunday
  * Sister Sister Sunday
  * Miz Helen's Country Cottage:  Full Plate Thursday
  * It's A Hodgepodge Life:  Hodgepodge Friday
  * Alli-n-son:  Sweet Tooth Friday


Photobucket

Tuesday, January 18, 2011

Project Idea: Felt Rose Heart Wreath


Y'all know how I love the flowers that are all the rage on the blogs so I couldn't help myself with this beautiful wreath from Life in The Thrifty Lane.  She has a complete tutorial on her blog.

Photobucket

Project Idea: Yearly Planner


Do you have a hard time finding the perfect yearly planner like I do?  Well....look no more!  Live.Laugh.Repeat has all the details and instructions on how she created her own planner and customized it to fit her needs.
Photobucket

Must Try Tuesday: January 18, 2011

Somehow Tuesday just flew right by and I completely forget to get out this post.  There are some really great recipes floating about, but here are some that I would like to try soon.

Taco Bell Sauce
Coleen's Recipes
Photo by Coleen's Recipes

~~~~

a little bit of everything
Photo by a little bit of everything

~~~~

C+C Marriage Factory
Photo by C+C Marriage Factory

~~~~

Susannah's {Kitchen}
Photo by Susannah's {Kitchen}

~~~~

Creative Domestic
Photo by Creative Domestic

~~~~

Linked To:

Monday, January 17, 2011

Project Idea: Valentine Wreath


Cute!  This wreath looks simple enough for even me to try.  Ali.Lily has the complete tutorial on her blog.
Photobucket

Project Idea: Valentine Favors


These cute Valentine favors were made by The Autocrat.  Check out her blog for instructions on how to make them.

Photobucket

Sunday, January 16, 2011

Menu Plan: Week of January 16, 20111

I have a couple of meals that I didn't make last week, so I will be making them this week.  Here is what I am planning for for this week:


Meal 1
Chicken Fried Steak
Mashed Potatoes with Gravy
Green Beans
Salad
Biscuits

Meal 2


Meal 3
Beanpot Soup
Cornbread

Meal 4
Cheesy Chicken and Corn Casserole
Salad
Biscuits

Meal 5
Onion Soup
Breadsticks
Salad

Meal 6
Spaghetti
Salad
Breadsticks

Meal 7
Sour Cream Chicken Enchiladas
Rice
Refried Beans

Additional Items
Monkey Muffins
Pumpkin Scones
Photobucket


Recipe: Taco Soup


This soup is so delicious on cold winter nights.  It has been downright cold and rainy here in Texas this past week.  While we didn't have all the snow that most in the South got, we did have cold winter days and nights.  I made this soup on one of those nights and it warmed us all up.  I don't make mine very spicy so this is a perfect soup to serve to kids as well. 

The great thing about this soup is it can really be a pantry meal.  If you don't have pinto beans, use ranch or black beans.  Or use all kidney beans.  Whatever hearty bean you have.  If you don't have stewed tomatoes, use all diced.  You can also throw it in the crock pot and let it simmer on low and have a great meal to come home to.  Just brown your meat first and then add it to the crock pot. 

It really is a great easy "throw together" soup.

Enjoy!


Taco Soup

2 lbs ground beef
1 medium onion, diced
1 bell pepper, diced
1/2 tsp salt
1 tsp pepper
1 pkg taco seasoning
1 pkg ranch dressing mix
1 can diced tomatoes (I use fire roasted)
2 cans stewed tomatoes
3 cans water
2 cans pinto beans
1 can light red kidney beans
1 can corn, drained
1 can green chilies, diced

Brown beef with onion and bell pepper.  Put all ingredients in a heavy pot or Dutch oven.  Simmer for 45 minutes.  Serve with shredded cheese, sour cream and corn chips.

PrintPhotobucket


Linked To:
 * Mommy's Kitchen:  Potluck Sunday
 * I Heart Naptime:  Sunday Scoop
 * 11th Heaven's Homemaking Heaven:  Homemaker Monday
 * All the Small Stuff:  Tuesdays at the Table

Project Idea: Valentine S'mores


I love this idea of s'mores for Valentines from Pittypat Paperie.  She has the instructions on her blog.

Photobucket

Saturday, January 15, 2011

Project Idea: Baking Cup Flower Valentines

Photo by Skip to my Lou

Love these adorable flower valentines made from cupcake liners.  Skip to my Lou has a tutorial on how to make these super simple beauties!
Photobucket


Project Idea: Mini Cupcake Stands


I absolutely love these!  And even better...they are easy to make!  The TomKat Studio has the tutorial on their blog.

Friday, January 14, 2011

Recipe Review: Cinnamon Butter


My girls and I love cinnamon butter especially on homemade bread that has been lightly toasted...so heavenly.  I found this most awesome recipe on one of my favorite blogs, Deals to Meals.  She has a couple more cinnamon butter recipes that I can't wait to try.  Every recipe that I have made from her blog turns out awesome.  I also used this butter for the filling in my Christmas morning cinnamon rolls and they tasted better than ever. 

Enjoy!

Cinnamon Butter
(recipe by Deals to Meals)

1 cup butter, softened (not melted)
1/3 cup sweetened condensed milk, chilled
1 tbsp light corn syrup (or 1 T. honey)
2 tsp cinnamon
1/8 tsp salt
1/2 cup powdered sugar

Mix all ingredients together on high speed until light and fluffy.

Print

Linked To:

Project Idea: Winter Wreath


I love this wreath made by The Country Chic Cottage.  Better yet, she made it with materials that she found on clearance after the holidays.  The color combo is one of my favorites.  You can find the tutorial on her blog.

Wednesday, January 12, 2011

Recipe Review: Homemade Yogurt


Two of my girls are yogurt lovers.  They especially love fruit yogurt.  I have spent a small fortune on yogurt over the years.  One day, I was cruising through my favorite blogs, A Year of Slow Cooking, and I came across this recipe for making yogurt in the crock pot.  Can you believe it?  You can make yogurt at home with a couple of ingredients and some time.  Ingredients that you probably already have on hand.  Of course, making yogurt at home is great, but it has the pass the taste test.  I made a batch over the holidays when my sister was here.  The kids that like yogurt, loved it!  My two girls have eaten several bowls.  In fact, I have since made another batch.  This recipe makes a large amount...bonus!  I found a gallon of organic milk marked down to $2.00 so I will be able to make two big batches of yogurt for $2.00.  Yes, that's right.....two bucks!  Better yet, if you set aside a half cup of the unflavored yogurt from your batch, you can use this the next time you make yogurt and you will never have to buy yogurt from the store again.

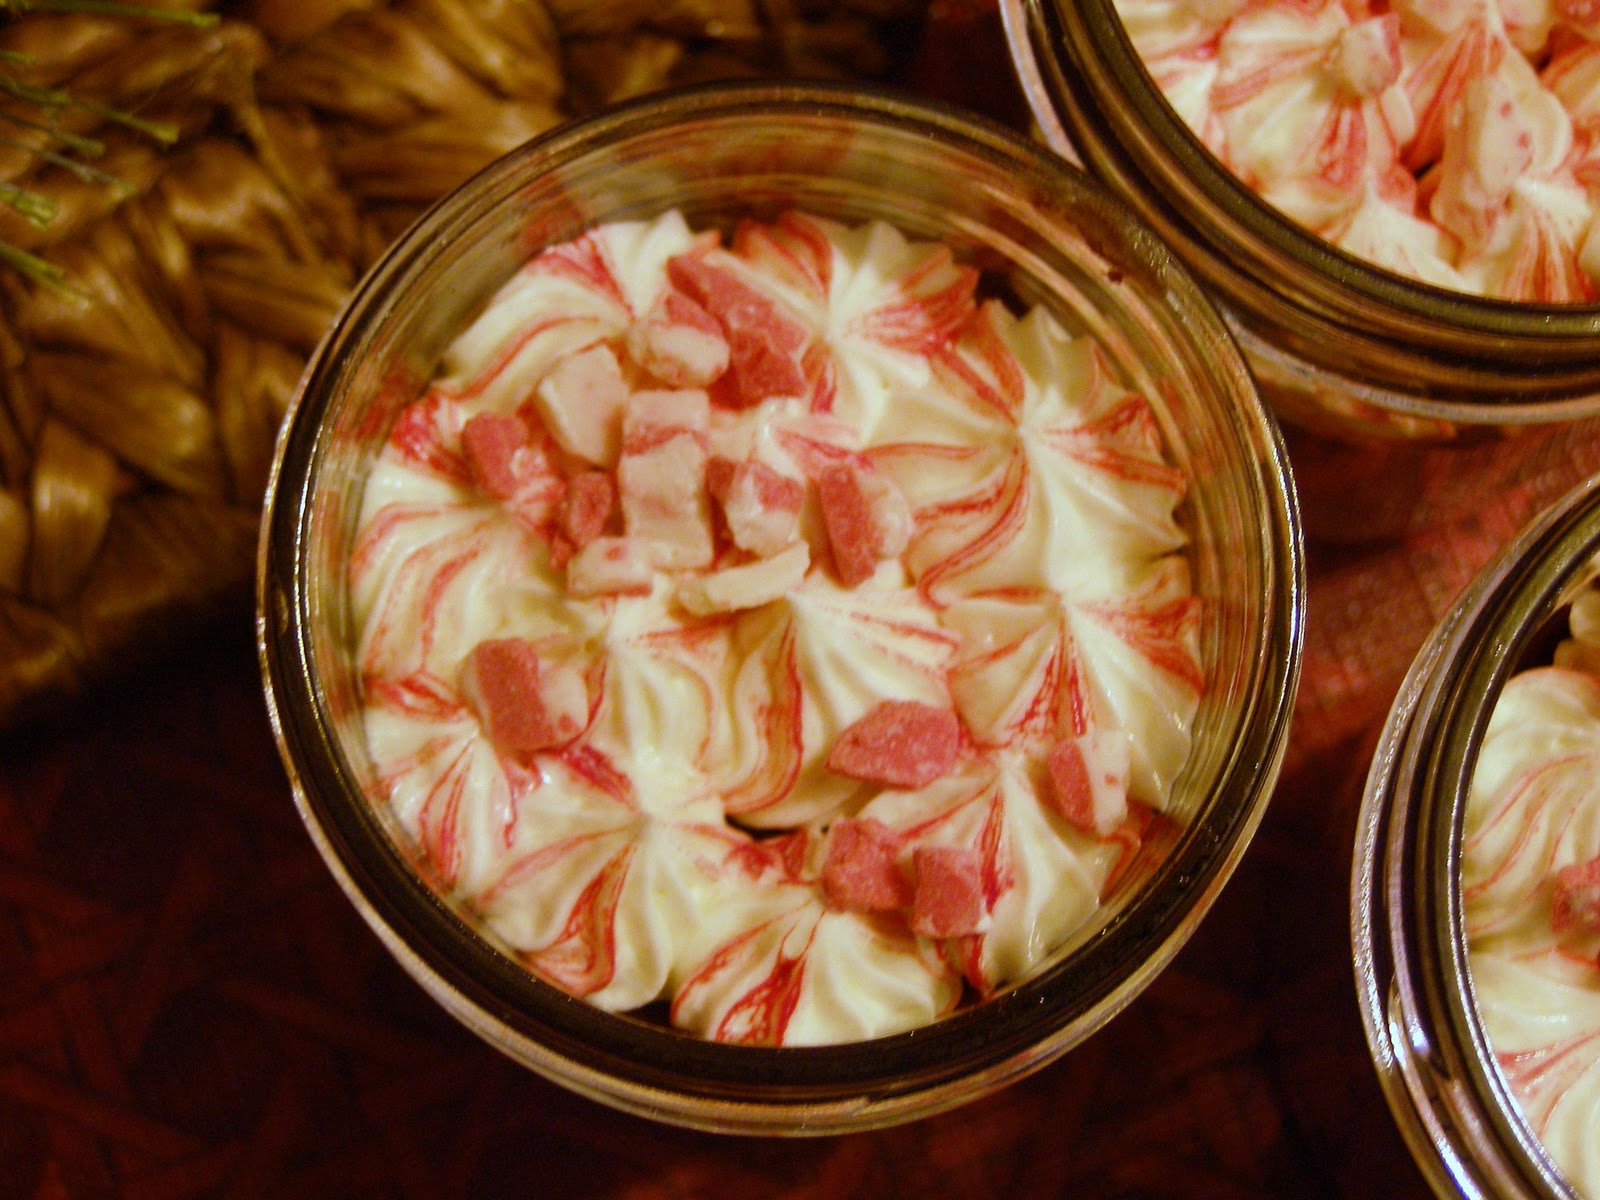
While this recipe is very easy and the crock pot does most of the work, it does take some time, so be prepared.  I also strain the yogurt to make it a bit firmer the way the my kids like it.  I strain it in batches through coffee filters and a colander and get about 3 cups of whey (this can be poured out).  My sister made a batch and put a pack of unflavored gelatin and got a firm yogurt.  My girl's love strawberry yogurt so I take about a cup of frozen strawberries with a half cup of sugar.  I let the strawberries macerate until they are thawed and then smash the berries with a fork to break them up a bit.  I then add the strawberries and juice to the yogurt and mix until combined.  According to my girls the yogurt is perfect and they like it much better than the expensive store bought kind. 

I highly recommend making your own yogurt.  I think you will be surprised by the results.

Enjoy!

Homemade Yogurt
(recipe by A Year of Slow Cooking)

8 cups (half-gallon) of whole milk--pasteurized and homogenized is fine, but do NOT use ultra-pasteurized
1/2 cup store-bought natural, live/active culture plain yogurt (you need to have a starter. Once you have made your own, you can use that as a starter)
frozen/fresh fruit for flavoring
4 quart crock pot

Plug in your crock pot and turn to low. Add an entire half gallon of milk. Cover and cook on low for 2 1/2 hours.  Unplug your crock pot. Leave the cover on, and let it sit for 3 hours.  When 3 hours have passed, scoop out 2 cups of the warmish milk and put it in a bowl. Whisk in 1/2 cup of store-bought live/active culture yogurt. Then dump the bowl contents back into the crock pot. Stir to combine.  Put the lid back on your crock pot. Keep it unplugged, and wrap a heavy bath towel all the way around the crock for insulation.  Let it sit for 8 hours.  After 8 hours, the yogurt will have thickened (it's not as thick as store-bought yogurt, but has the consistency of low-fat plain yogurt).

Blend in batches with your favorite fruit. When you blend in the fruit, bubbles will form and might bother you. They aren't a big deal, and will settle eventually.  Chill in a plastic container(s) in the refrigerator. Your fresh yogurt will last 7-10 days. Save 1/2 cup as a starter to make a new batch.

Yogurt after 8 hours.

Print

Linked To:

Tuesday, January 11, 2011

Project Idea: Floral Headband


Another cute take on a floral headband.  Easy Peasy Lemon Squeezy has a cute tutorial on how to make this simple floral headband.

Must Try Tuesday: January 11, 2011

The blogs were full of yummy good stuff this past week. I can't wait to get in to the kitchen to give some of these a try!

Brown Eyed Baker
Photo by Brown Eyed Baker
~~~~

Skip to my Lou
Photo by Skip to my Lou
~~~~
Recipe Shoebox
Photo by Recipe Shoebox

~~~~

Mel's Kitchen Cafe
Photo by Mel's Kitchen Cafe
~~~~

Coleen's Recipes
Photo by Coleen's Recipe

~~~~

Mac and Cheese Soup
Mangoes and Chutney
Photo by Mangoes and Chutney

~~~~