Showing posts with label Recipe Review. Show all posts

Monday, December 5, 2011

Recipe: The Best Baked Ziti


In my efforts to incorporate more meatless meals into my family's diet, I have been searching for hearty dishes that will fill their bellies up.  Some recipes my family have loved and some they haven't.  Pasta dishes always win because they are satisfying and tasty.  Tasty, according to my family, because they usually have lots of cheese!  I came across this dish on Maggie's Vittles and Bits.  If you have not been to her blog...you MUST!  She has some fabulous recipes and this dish is a real winner!  We ate this dish up and enjoyed it with a salad and some crusty bread.  I used penne pasta because my little grocery store doesn't carry anything "fancy" like ziti.  Penne is pretty exotic around these parts.  I also made her Spicy Tomato Sauce and it is so hearty and delicious.  This dish was perfect and will be added to our regular dinner menu rotation.

Enjoy!


The Best Baked Ziti
(original recipe by Maggie/Vittles and Bits)

Ingredients
16 oz ziti pasta (or penne)
2 cup small curd cottage cheese
2 eggs
1/2 cup freshly grated parmesan or romano cheese
3 1/2 cup Spicy Tomato Sauce (or any good quality jarred sauce)
3/4 tbsp cornstarch
1/2 tsp garlic powder
1/4 cup heavy cream
3/4 cup milk
1 1/2 cups freshly grated mozzarella cheese
2 tbsp fresh basil, chopped
pepper, to taste

Directions
Combine cottage cheese, eggs and 1/4 cup parmesan cheese in a small bowl.  Set aside.  Grease a 13x9 baking pan and set aside.  Preheat oven to 350 degrees.  Bring a large pot of water to boil.  Add pasta and cook about 5 minutes.  (The pasta will finish cooking in the oven.  This prevents the pasta from getting soggy.)  Drain pasta.  Return the now empty pot to the stove over medium-low heat.  Add cornstarch, garlic powder, cream and milk.  Bring to a simmer and cook until thickened, about 3-4 minutes.  Remove cream sauce from heat and add cottage cheese mixture along with 1 cup of the tomato sauce and 1 cup of mozzarella cheese.  Stir to combine and add pasta.  Stir to coat the pasta thoroughly with the sauce.  Transfer pasta to prepared baking dish and spread evenly.  Pour remaining 2 1/2 cups tomato sauce over the top and spread in an even layer.  Sprinkle chopped basil, pepper and remaining 1/4 cup parmesan over the top.  Then sprinkle the remaining 1/2 cup (or more) mozzarella cheese.  Cover dish tightly with foil and bake for 45 minutes.  Remover foil and back and additional 15 minutes.  Remove from oven and serve.

Linked To:
*Everyday Sisters: Sharing Sundays
*The Sweet Details: Savory Sunday
*LambAround: Not Baad Sundays 
*Nifty Thrifty Things: Nifty Thrifty Sunday 
*Flamingo Toes: Think Pink Sundays 
*Petite Hermine: Sunday Linky Party
*My Sweet and Savory: Meatless Mondays
*Boogieboard Cottage: Masterpiece Monday 
*11th Heaven's Homemaking Haven: Homemaker Monday
*Frugal Antics of a Harried Homemaker: Your Recipe, My Kitchen 
*Make Ahead Meals for Busy Moms: Melt in Your Mouth Monday 
*Delightfully Dowling: Mangia Mondays 
*A Southern Fairytale: Mouthwatering Monday 
*Marvelously Messy: A Marvelous Mess 
*Blessed with Grace: Tempt My Tummy Tuesday
*It's A Blog Party: Delicious Dishes 
*Mandy's Recipe Box: Totally Tasty Tuesday 
*33 Shades of Green: Tasty Tuesday 
*Permanent Posies: Tasty Tuesday Tidbits 
*Chef In Training: Tuesday Talent Show 
*From Mess Hall to Bistro: Made From Scratch Tuesday 
*Around My Family Table:  Turning the Table Thursday
*Miz Helen's Country Cottage: Full Plate Thursday 
*Somewhat Simple: Strut Your Stuff 
*Designs by Gollum: Foodie Friday 
*Six Sisters' Stuff: Strut Your Stuff Saturday
*This Chick Cooks: These Chicks Cooked  

Recipe: Spicy Tomato Sauce


Pasta dishes are a favorite here at our house.  I love to make my own sauce when I can and we have an absolute favorite, Roasted Roma Tomato Sauce.  It is a sweet sauce that is made with roasted roma tomatoes and it oh-so-good.  Recently, I came across a recipe for baked ziti on the blog Vittles and Bits, that I wanted to try.  In the recipe was a link for Spicy Tomato Sauce and because I didn't have any roma tomatoes available, I thought I would give it a try.  I am so glad I did.  I did adapt the recipe just a small bit for my family's liking but the sauce was hearty and perfectly seasoned and it made the ziti dish taste so good!  It made a large pot, that while it was cooking smelled unbelievable, so I had enough for our baked ziti and lots of leftovers.

Enjoy!

Spicy Tomato Sauce
(adapted slightly from the recipe by Maggie/Vittles and Bits

Ingredients
3 tbsp olive oil
4 cloves garlic, chopped
1 8-oz can tomato paste
1/2 cup beef broth
1 cup water
2 tbsp Worcestershire sauce
2 28-oz cans crushed tomatoes
2 tbsp dried parsley
1 tbsp dried basil
2 heaping tsp black pepper
1 heaping tsp salt
1 tsp onion powder
1/4 tsp garlic powder

Directions
In a large pot, heat the olive oil over medium-low.  Add fresh garlic.  Oil should be hot enough that when the garlic is added, it will sizzle, but not too hot that it will burn the garlic.  Brown the garlic just slightly, until fragrant, about 1 to 2 minutes.  Add water, broth, Worcestershire sauce and tomato paste and stir until heated through.  Add parsley, basil, salt, pepper, garlic powder, onion powder and crushed tomatoes.  Stir to combine.  Bring sauce to a boil, then reduce heat to low and simmer the sauce for about an hour, stirring occasionally. 


Wednesday, October 5, 2011

Recipe: Bacon and Cheese Muffins


My family loves muffins!  Pancakes and muffins...two of my kids favorite things.  We definitely have our tried and true favorite recipes for both, but we are like to experiment.  Okay, I like to experiment and my family reaps the rewards.  I have been looking for some new muffin recipes to give a try and hopped over to one of my favorite blogs, Mommy's Kitchen.  I absolutely love Tina's blog and have enjoyed many a great meal from her shared recipes.  And, bonus, like me she lives in Texas not too far from where I live (which would be the middle of nowhere, but I LOVE it!).  As I was perusing, I came across this recipe for Bacon and Cheese muffins.  It has our family's favorite two food groups...bacon and cheese.  I knew that my kids, and husband, would gobble these up in no time.  They did and loved it!

These muffins are tender and delicious!  I know they would be perfect to freeze and pull out on those morning when we are rushed.  Mine never made it to the freezer because they were immediately enjoyed!


Bacon and Cheese Muffins
(recipe by Tina/Mommy's Kitchen)

2 cups AP flour
2 tsp baking powder
1/4 tsp salt
1/4 tsp black pepper
1 1/4 cup.milk
1/4 cup butter or margarine, melted and cooled
1 egg
1/2 lb bacon, diced, cooked and degreased
3/4 cup cheddar cheese, shredded

Preheat oven to 400 degrees.  In a large mixing bowl, stir together flour, baking powder, salt and pepper. In a small bowl, mix together the milk, melted butter or margarine and eggs. Add the wet ingredients to the dry ingredients and stir just until moistened. Fold in the bacon and cheese just until combined. Scoop into greased or lined muffin tins. Bake for 20-25 minutes, until lightly golden brown.

Enjoy!


Linked To:
*It's A Keeper: It's A Keeper Thursday
*This Chick Cooks: These Chicks Cooked
*Dining with Debbie: What's On The Menu Wednesday
*Not So Homemade: What's Cooking Wednesday
*Life as Mom: Ultimate Recipe Swap
*Ekat's Kitchen: Friday Potluck 
*Make Ahead Meals for Busy Moms: Melt in Your Mouth Monday 
*Talking Dollar and Cents: Muffin Monday
*A Southern Fairytale: Mouthwatering Monday
*Frugal Antics of a Harried Homemaker: Your Recipe, My Kitchen


Tuesday, September 20, 2011

Recipe: Copycat Pizza Hut Stuffed Crust Pizza


We live in the middle of nowhere.  I love being out in the country but there are times when it is dinner (or supper as we say here in the south) time and I have nothing ready (usually because I didn't have a meal plan for the week).  I miss being able to run out to get something at one of our favorite restaurants or order out for pizza delivery.

Pizza Hut's stuffed crust pizza is a family favorite and I have tried a couple of recipes but they just weren't quite right.  We do have a local pizza place, Hometown Pizza, that we LOVE but they don't deliver which is good because we could eat their pizza everyday.  I think that they put crack in the crust...I am almost positive that they do.  My family and I cannot get enough of their pizza.  But I digress.

Now, I do have a favorite pizza crust recipe that I have used for years and it is fabulous because the crust is made in the bread maker.  While this recipe is a bit more work that I am used to, it was totally worth it!  The crust and sauce tasted just like Pizza Hut's.  I was impressed, but more importantly, my family was as well.  

The most important part that should not be skipped, is refrigerating the dough overnight.  This gave the crust a nice taste and texture, more of a "yeasty" taste just like Pizza Hut.

Enjoy!


Copycat Pizza Hut Stuffed Crust Pizza
(recipe by Todd Wilbur/The Best of Top Secret Recipes)

Crust: 
3/4 cup of warm water
1 1/4 tsp of yeast
1 tbs of sugar
2 1/4 cups of bread flour
1 1/2 tsp of salt
1 1/2 tsp of olive oil

Sauce: 
1 15 oz can of tomato sauce
1/4 tsp dried oregano
1/4 tsp of dried basil leaves
1/4 tsp of thyme
1/4 tsp of garlic powder
1/4 tsp salt
1/8 tsp black pepper
1 bay leaf
dash of onion powder
1/2 tsp lemon juice

8 1oz mozzarella string cheese sticks
1 1/2 cups (or more) of shredded mozzarella

Toppings of your choice


For the crust,combine the warm water, sugar and yeast in a small bowl, stir until dissolved. Let sit for 5 minutes until it foams. In a large bowl sift together the flour and salt, make a depression in the center and pour in the yeast mixture. Add oil. Slowly combine all ingredients until the dough forms into a ball. Dust a clean flat surface with flour, knead the dough until smooth consistent texture which takes about ten minutes. Rub a light coating of oil on the dough, then put in tight container and a warm place to rise for two hours or until double size. When doubled in size, punch down and put back in container and refrigerate overnight. You can use right away, but refrigerating overnight gives you the best "Pizza Hut" taste.

For the sauce, combine tomato sauce, lemon juice and spices in a sauce pan. Simmer for 30 to 60 minutes until desired thickness.

One hour before using the dough take out of refrigerator and let it set until it reaches room temperature. Preheat oven to 475 degrees. Roll out the dough on floured surface until 18 in across. Put the dough on a greased pan that has been sprinkled with corn meal to keep the crust from sticking to the pan.  With a fork, poke the pizza several times to prevent the crust from bubbling up. Place a ring of cheese from end to end all the way around. Fold dough over cheese, pressing firmly.  Brush the top of folded dough with olive oil. Cover with the dough with sauce and desired toppings.  Sprinkle with mozzarella cheese. Bake for 12 to 16 minutes until the crust turns golden brown and cheese has golden spots.  Remove from the oven, slice and serve hot.

Linked To:
* It's A Blog Party: Delicious Dishes
* Blessed with Grace: Tempt My Tummy Tuesday


Monday, August 1, 2011

Recipe Review: Peanut Butter Truffle Centered Banana Bread Muffins


The day that I saw Jenny from Picky Palate post this recipe, I knew that I had to try it!  I had already planned to make banana bread, but this looked like a fun twist.  My over ripe bananas were practically begging me to make this...

And I did and they were amazing!  I didn't have enough regular peanut butter (I have some PB&J fanatics in my house) so I used about a cup of dark chocolate peanut butter.  It was like having a buckeye in the middle of a very moist banana muffin.  I will be making these again to try them with regular peanut butter, but I will also be making them again with my chocolate peanut butter.  My girls loved these and have already asked me to make them.  I think these would be great frozen and put in their lunch boxes.  

Enjoy!


Peanut Butter Truffle Centered Banana Bread Muffins
(original recipe by Jenny/Picky Palate)

1 1/4 cups creamy peanut butter (I used a combo of 1/2 cup regular PB and 3/4 cup dark chocolate peanut butter)
1 cup powdered sugar
2 large ripe bananas or 3 small
3/4 cup sugar
1/4 cup light packed brown sugar
1 large egg
1 cup buttermilk
1 1/4 cups flour
1 teaspoon baking soda
1/2 teaspoon salt
1/4 teaspoon ground cinnamon

Preheat oven to 350 degrees.  Line a muffin tin with cupcake liners.  To make the peanut butter truffle, place peanut butter and powdered sugar into a medium bowl, mixing until combined. Scoop out a walnut sized amount of peanut butter mixture and roll between your hands to make a ball.  Place a ball into each cupcake liner.  To make the banana bread muffin, mash bananas with a fork until well mashed in a large bowl. Stir in sugars, egg and buttermilk until well combined. Gradually add flour, baking soda, salt and cinnamon until just combined. Don't over mix.  Scoop batter over peanut butter truffle filled cups, about 3/4 full. Bake for 18 to 20 minutes, until cooked through. Let cool completely and serve.

Linked To:
*Talking Dollar and Cents: Muffin Monday
*A Southern Fairytale: Mouthwatering Monday
*Frugal Antics of a Harried Homemaker: Your Recipe, My Kitchen
*Blessed with Grace: Tempt My Tummy Tuesday
*My Sweet and Savory: Let's Do Brunch
*From Mess Hall to Bistro: Made from Scratch Tuesday
*Good Cheap Eats: What's On Your Plate 


Monday, July 25, 2011

Recipe Review: Cherry Limeade Cupcakes


Yum...cherry limeade drinks from Sonic are my favorite drink treat.  So, when I came across this recipe from It's the Life blog, I knew that I had to try it.  I signed up to feed the volunteers at Vacation Bible School and wanted to make something pretty and tasty.  These were perfect.  Not only are they pretty to look at but they taste so good!  The cupcakes were gone in no time and I received lots of compliments.  I will be making these again for an upcoming family reunion but will probably double the recipe because they were so awesome.  I will also use stemmed cherries as well....I think they will look prettier.

Enjoy!

Cherry Limeade Cupcakes
(original recipe by It's the Life)

Cupcakes
1 box white cake mix (and all ingredients needed to make the cake)
1 jar maraschino cherries (with or without stems)
1 cup powdered sugar
2 limes

Buttercream Frosting
1 bag powdered sugar
2 sticks butter, room temperature
1 lime
milk

To make the cupcakes, preheat oven and make the batter according to the package directions.  Add 3 to 4 tablespoons of the cherry liquid into the batter.  You could chop some of the cherries and add to the batter, but I wanted a smooth cupcake.  While the cupcakes are baking, make a lime glaze by mixing the juice of two limes with one cup of powdered sugar.  Once the cupcakes are removed from the oven, poke several (I did at least 10 to 12) holes with a toothpick in each cupcake.  With a spoon, slowly spoon the glaze on each cupcake, using the back of the spoon to spread it out covering each hole.  Allow the cupcakes to sit a few minutes and repeat the glazing.  Loosely cover cupcakes and refrigerate for a few hours.  While the cupcakes are cooling, drain the cherries and rinse them thoroughly.  Drain them on paper towels for a few hours.  (This step will ensure that the cherries don't bleed in your beautiful white frosting.)

To make the frosting, beat the softened butter until fluffy.  Slowly add the powdered sugar, beating to ensure there are no lumps.  I used all but about a cup of powdered sugar because I like a stiffer frosting.  I had some leftover glaze, so I also added this along with the juice of one lime.  Add a little milk, if needed, to thin it out a bit.  Frost as you normally would.  Add the dried cherry to top of each cupcake.

Linked To:
*Lamb Around: Not Baad Sundays
*The Girl Creative: Just Something I Whipped Up
*Boogieboard Cottage: Masterpiece Monday
*11th Heaven's Homemaking Heaven: Homemaker Monday 
*Two Maids a Milking: Two Maids a Baking
*Sumo's Sweet Stuff: Market Yourself Monday
*Frugal Antics of a Harried Homemaker: Your Recipe, My Kitchen
*A Southern Fairytale: Mouthwatering Monday 
*Blessed with Grace: Tempt My Tummy Tuesday 
*Dr. Laura's Adventures: Tasty Tuesday
*Mandy's Recipe Box: Totally Tasty Tuesday 
*From Mess Hall to Bistro: Made From Scratch Tuesday 
*Lady Behind the Curtain: Cast Party Wednesday
*It's a Keeper: It's a Keeper Thursday
*Sweet as Sugar Cookies: Sweets for Saturday
*Everyday Sisters: Sharing Sundays 
*Hoosier Homemade: Cupcake Tuesday


Thursday, July 21, 2011

Recipe Review: Buffalo Chicken Braid


We love Buffalo chicken wings around here.  I don't care for chicken on a bone, so we go boneless.  When I came across this recipe on Do You Know the Muffin Pan blog, I knew that I had to give this recipe a try.  Seriously, what could be bad about spiced up chicken wrapped in pizza dough?  Sounds like a winner to me.  This recipe is super easy.  Braiding the dough is a few extra steps but totally worth it.  Amy has step by step instructions with pictures to help you get the idea of how to braid the dough.  I used a canned pizza dough and canned chicken for a super fast dinner.  Also, I didn't have any blue cheese dressing, so I made mine without.  The next time I make it, I will use my own dough and cook and shred some chicken breast to replace the canned chicken.  My family loved this meal and have asked for me to make it again.

Enjoy!


Buffalo Chicken Braid
(adapted from the original recipe by Amy @ Do You Know the Muffin Pan)

1 can chicken breast, drained (or 2 chicken breast, cooked and shredded)
1 can pizza dough
2 cups cheese, divided (I used a combination of blue cheese and Italian blend shredded cheese)
1/2 cup red onion, finely diced
1/2 cup Frank's Red Hot Sauce

Preheat oven to 425 degrees.  In a small bowl, add chicken and hot sauce.  Mix with a fork breaking up any large lumps while incorporating the sauce.  Set aside.  Unroll pizza dough.  Measure 3" from the long side of the dough and lightly score (not cutting through the dough) on each side.  In the middle section, sprinkle one cup of the cheese making sure to spread it so it covers from the top to the bottom of the dough.   Next, spread the diced onions.  Add the chicken.  Sprinkle the rest of the cheese making sure to cover as much of the chicken as you can. Cut 1 inch thick strips on either side. To braid, pick up one strip and fold it over, pressing it against the opposite strip, continuing until you reach the bottom.  You can tuck the bottom ends under, but it is not necessary.  Bake for 12 to 15 minutes or until golden.  Allow to cool for few minutes before cutting.

Linked To:
*It's a Keeper: It's a Keeper Thursday
*Paisley Passion: Thrilling Thursday
*Miz Helen's Country Cottage: Full Plate Thursday
*Simply Sweet Home: Friday Favorites
*Bizzy B. Bakes: Bake with Bizzy
*Paisley Passions: Fun w/Food Friday
*Six Sister's Stuff: Strut Your Stuff Saturday 
*I Heart Naptime: Sundae Scoop 


Thursday, July 7, 2011

Recipe Review: Smothered Pork Chops

I found this recipe at Mel's Kitchen Cafe and immediately knew that I was going to be giving it a try very soon.  I even added it to my Must Try Tuesday post.  There is nothing better in the world than walking into your house after church knowing that you have a crock pot full of yummy goodness.  As soon as you open your door the smell is so wonderful that you immediately know that this is going to be one tasty dinner.  We had a house full of company and not only was this dish so delightful, it was also easy to prepare.  We served it with mashed potatoes and spooned some of the gravy over the them.  Everyone enjoyed this recipe and it is definitely a keeper in our house and will be made for many Sunday dinners to come.

Enjoy!


Smothered Pork Chops
(original recipe by Mel's Kitchen Cafe)

Ingredients
5 slices bacon, chopped
6 bone-in pork loin chops, about 3/4-inch thick
Salt and Pepper
2 yellow onions, peeled, halved and sliced into 1/2-inch thick half moons
1 teaspoon plus 1 tablespoon light brown sugar
1/4 cup plus 2 tablespoons cold water
3 garlic cloves, minced
1 teaspoon dried thyme
3 cups low-sodium chicken broth
1 tablespoon soy sauce
2 bay leaves
1 tablespoon cornstarch
1 tablespoon cider vinegar
2 tablespoons fresh parsley, chopped

Directions
In a large skillet over medium heat, fry bacon until lightly browned, about 5-6 minutes. Transfer bacon to a plate lined with paper towels, leaving the drippings in the pan. If you have more than 2 tablespoons drippings, drain the excess. If you don’t have quite that much, supplement with canola oil. When the bacon is cool, transfer to a small bag or tupperware and refrigerate until later.

Heat the skillet with the drippings over medium or medium-high heat until rippling and hot. Meanwhile, pat pork chops dry with paper towels and sprinkle with salt and pepper. Cook pork chops until they are golden brown on each side, about 2 minutes per side, cooking them in batches in the skillet if your skillet isn’t big enough to hold all six at a time in a single layer. When golden on each side, transfer the chops to the slow cooker and repeat with remaining pork.

Pour off all but 1 teaspoon of fat from the skillet; add onions, 1 teaspoon brown sugar, 1/4 teaspoon salt and 1/4 cup water to empty skillet. Using a wooden spoon, scrape browned bits from bottom of the pan and cook over medium-high heat until onions are soft, about 4-6 minutes. Stir in garlic and thyme and cook until fragrant, about 30 seconds. Pour onion mixture over chops in the slow cooker. Add broth, soy sauce and remaining 1 tablespoon brown sugar to skillet, bring to a boil and add bay leaves. Pour mixture over onions in slow cooker.

Cover slow cooker and cook on low until pork is tender, about 8 hours (or cook on high for 4 hours).

When ready to serve, carefully transfer chops to serving platter with a large spoon and tent with foil. Discard bay leaves and pour liquid through a mesh strainer into a saucepan, reserving the solids. Transfer solids to a food processor or blender with 1 cup liquid and blend until smooth. Stir the blended mixture back into remaining liquid in the saucepan. In a small bowl, mix cornstarch and remaining 2 tablespoons water together in a small bowl and stir into sauce. Cook over medium heat until thickened and bubbly, about 5 minutes. Stir in vinegar, season with salt and pepper, pour over chops and sprinkle with reserved bacon and parsley. Serve.

Sunday, May 15, 2011

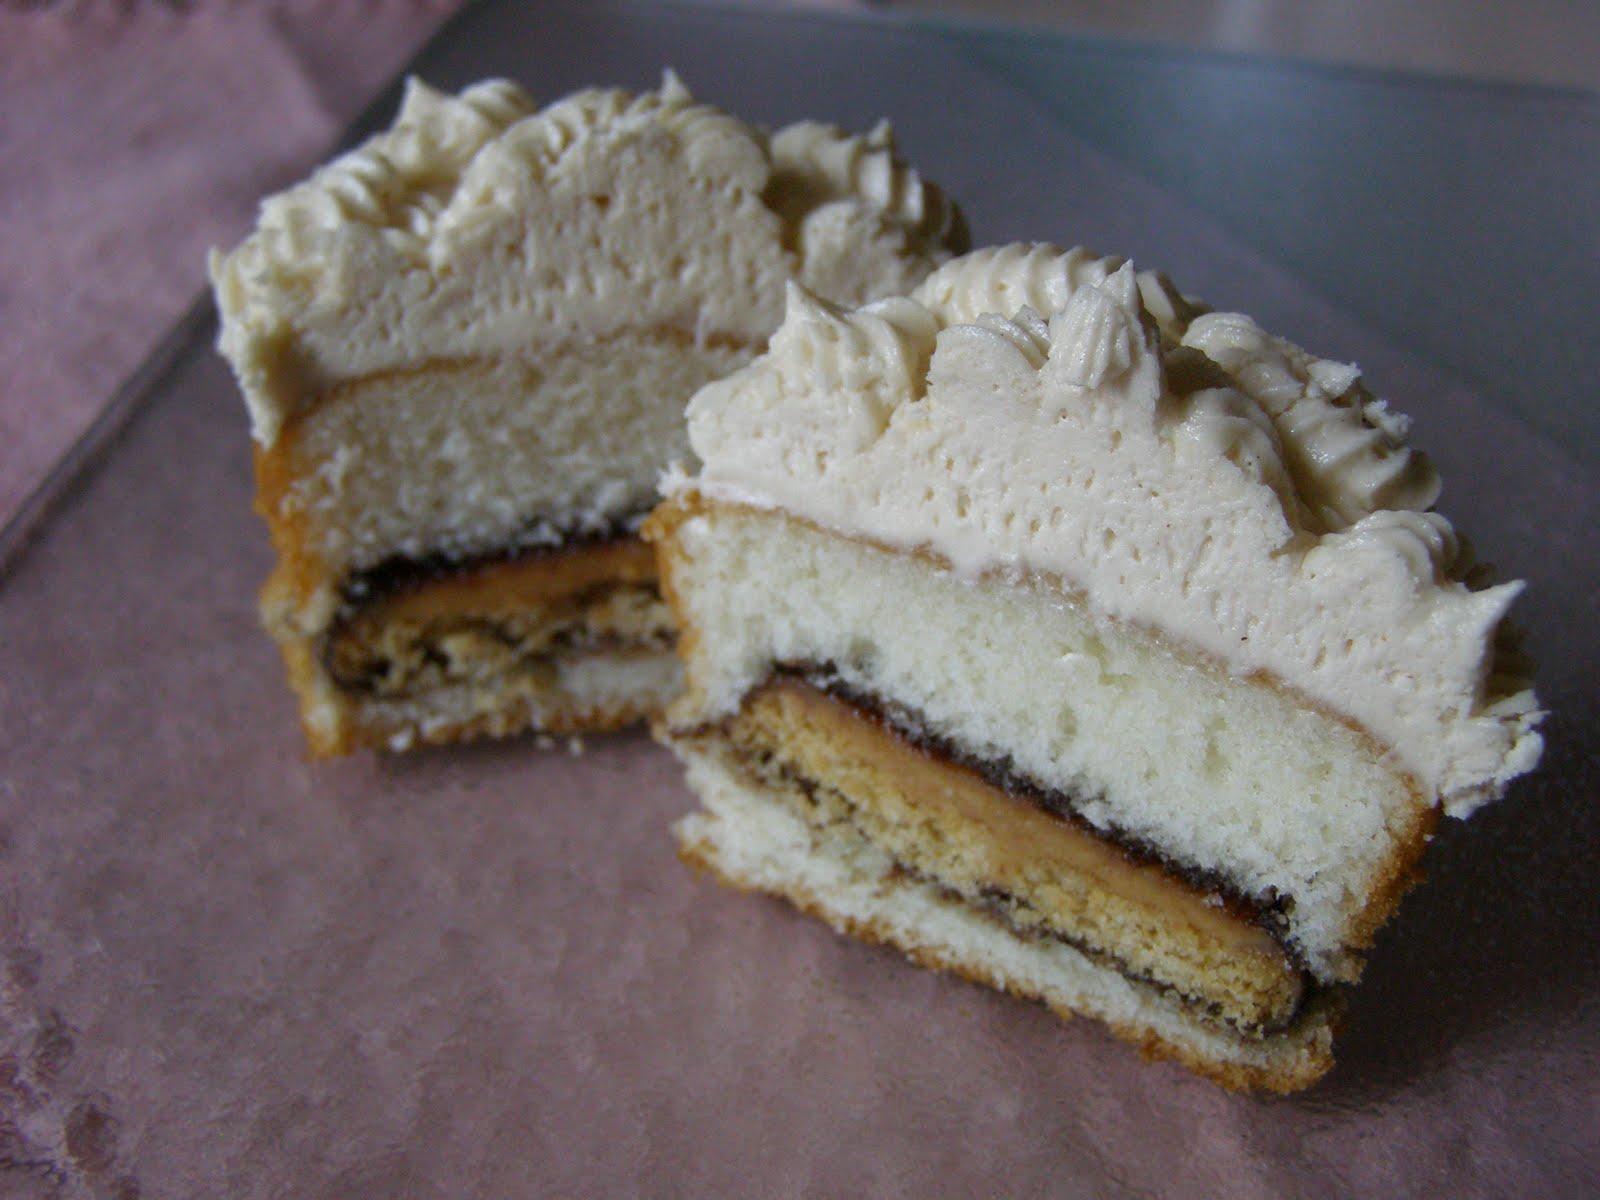
Recipe Review: Tagalong Cupcakes


I have been wanting to make these cupcakes for months.  This recipe comes from one of my favorite blogs, InsideBruCrew Life.  She has the most awesome recipes!  I saved back a box of Tagalongs with this recipe in mind.  Boy, I am so glad I did!  These were so so very good and my family has eaten them up.  I love the fact that they are made with a box cake mix...saved me some time.  If you have a box of Tagalongs stashed away somewhere, you must give these a try!

Enjoy!


Tagalong Cupcakes

1 vanilla cake mix 
Tagalong Cookies (from your favorite Girl Scout)

Preheat oven to 350* Place liners in cupcake pan. Make up the cake mix according to the directions. Put 2 tablespoons of batter in each liner. Set a cookie on top of the batter in each liner and then finish filling the liner with batter. Fill it at least 3/4 of the way full. Bake 22-24 minutes. Let cool. Frost with Honey Peanut Butter Cream. Add sprinkles and eat!

Honey Peanut Butter Cream
1 cup butter, softened
1/2 cup peanut butter
2 tbsp water
2-4 tbsp honey
1 tsp vanilla
1/8 tsp salt
4 cup powdered sugar

Cream butter and peanut butter. Add the water, salt and vanilla and cream again. Slowly add the powdered sugar. After all the sugar is added, beat in another 1-2 tbsp water. Then beat in the honey until creamy. 


Photobucket

Wednesday, March 9, 2011

Recipe Review: Crock Pot Chicken Parmesan


When I came across Monster Mama's post for Crock Pot Chicken Parmesan, I knew that I would be making it in the very near future.  In fact, I featured it on a Must Try Tuesday post.  I love when I can use my crock pot...it just makes getting dinner on the table on those hectic days, so much easier.  It also sounded like the perfect Sunday dinner.  After all, who doesn't love the smell of a cooked meal after getting home from church? 

What makes this recipe unique, in my opinion, is that you don't have to pan fry the chicken in the breading before adding it to the crock pot.  You simply dredge your uncooked breast in egg and bread crumbs and add it to the crock pot.  So super simple!

I made just a few changes to the recipe.  Instead of using a jar sauce, I used my roasted Roma tomatoes which made this dish out of the world good!  I also did not have mozzarella slices on hand so I used shredded.  I wish there was smell-a-vision!  My kids came in and out of the kitchen several times asking if dinner was ready because it smelled so good and they wanted the yummy goodness...lol!

I highly recommend this recipe to any and all...especially if you are looking for a hearty delicious meal that doesn't require a lot of time!


Crock Pot Chicken Parmesan
(adapted from recipe at Monster Mama)
{print}

Ingredients
3-5 boneless, skinless chicken breasts

1/2 c Italian seasoned bread crumbs
1/2 c grated Parmesan cheese
1/4 tsp black pepper
1/4 tsp kosher salt
1 Tbsp olive oil
1 egg beaten
1 cup shredded mozzarella
1 batch roasted Roma tomatoes (makes 6 cups, use more or less to your liking)

Directions
Drizzle olive oil all over bottom of the crock pot. In a medium bowl or shallow plate, beat egg. In another bowl or shallow plate, mix bread crumbs, spices and grated cheese together and set aside. Dip each chicken breast into egg and then dredge in your breadcrumb mixture, making sure to evenly coat all sides. Place coated chicken on the bottom of crock pot. Sprinkle mozzarella on top of the chicken and pour the roasted Roma tomatoes and sauce over the chicken breasts. Cover and cook on LOW for 6-7 hours.

Serve with over a bed of pasta.

Linked To:
 * Mandy's Recipe Box:  Totally Tasty Tuesday
 * At the Well:  Tempt My Tummy Tuesday
 * It's A Blog Party:  Delicious Dishes
 * All the Small Stuff:  Tuesdays at the Table
 * From Mess Hall to Bistro:  Made from Scratch Tuesday
 * Fudge Ripple:  Tuesday Night Supper Club
 * From My Tiny Kitchen:  Gold Star Wednesday
 * Life as Mom:  Ultimate Recipe Swap
 * Dining with Debbie:  What's On the Menu Wednesday
 * It's A Keeper:  It's A Keeper Thursday
 * Prairie Story:  Recipe Swap Thursday
 * Miz Helen's Country Cottage:  Full Plate Thursday
 * Mommy's Kitchen:  Potluck Sunday
 * Six Sister's Stuff: Strut Your Stuff Saturday

Friday, March 4, 2011

Recipe Review: Go Bananas Whoopie Pies


Whoopie Pies....doesn't that sound like yummy goodness?  I think so and decided to make a batch after seeing whoopie pies featured in the current issue of Taste of Home.  I scored an awesome deal of 10 pounds of ripe bananas for a whole dollar and wanted to use them up quick.  This was my first attempt at making whoopie pies.  The method is simple but they do require a bit of time. 

The cookie is soft and very moist.  I found that refrigerating the dough about 30 minutes before baking made it easier to scoop it out evenly.  You want to bake the cookies and watch them carefully.  After making the first few batches, I realized that my edges were a bit more brown that I like (as you can see in the photo).  When I make these again, I will pull them out just as they are starting to brown on the edges. 

The filling is very soft and I realized as I was putting the filling onto the cookies that it would have been better to let it set up in the refrigerator as well.  The next time that I make this, I think I will pipe the filling onto the cookies. 

My family enjoyed these very much and they were gone quickly.  This is a great recipe that I will be making again.


Go Bananas Whoopie Pie
(recipe from Taste of Home)

Ingredients 

COOKIE:
1/2 cup butter, softened
3/4 cup sugar
1/4 cup packed brown sugar
1 egg
1 teaspoon vanilla extract
1/2 cup mashed ripe banana
1/2 cup buttermilk
2 cups all-purpose flour
1/2 teaspoon salt
1/2 teaspoon baking powder
1/2 teaspoon baking soda


FILLING:
1 package (8 ounces) cream cheese, softened
1 cup creamy peanut butter
3 tablespoons butter, softened
1 cup confectioners' sugar
1 teaspoon vanilla extract


Additional confectioners' sugar


Directions


In a large bowl, cream butter and sugars until light and fluffy. Beat in egg and vanilla. In a small bowl, combine banana and buttermilk. Combine the flour, salt, baking powder and baking soda; gradually add to creamed mixture alternately with banana mixture.  Drop by tablespoonfuls 2 in. apart onto parchment paper-lined baking sheets. Bake at 350° for 12-15 minutes or until set. Cool for 2 minutes before removing from pans to wire racks to cool completely.  For filling, in a large bowl, beat the cream cheese, peanut butter, and butter until fluffy. Beat in confectioners' sugar and vanilla until smooth. Spread filling on the bottoms of half of the cookies, about 1 tablespoon on each; top with remaining cookies. Dust with additional confectioners' sugar, if desired. Store in the refrigerator. Yield: 2 dozen.


Linked To:
 * My Sweet and Savory:  Let's Do Brunch
 * EKat's Kitchen:  Friday Potluck
 * Designs by Gollum:  Foodie Friday
 * Paisley Passions:  Fun With Food Friday
 * Sweet As Sugar Cookies:  Sweets for Saturday
 * Lamb Around:  Not Baad Sundays
 * Fudge Ripple:  Tuesday Night Supper Club
 * Don't Waste your Homemaking:  Unwasted Homemaking Party

Photobucket

Saturday, February 26, 2011

Recipe Review: Roasted Roma Tomatoes


Oh....this is so yummy goodness!  I LOVE tomatoes...anyway that I can get them, but roasted tomatoes....I can't even begin to describe the pure delight they give me.  My children are the same way.  I have two that don't like raw tomatoes at all, but they will eat roasted tomatoes with crackers and cheese.  I keep a jar of this delightful goodnes in the fridge...to be at my beck and call when I need a fix!  I have used it in sauces for pasta and it takes my homemade sauce to another level...no lie!

I discovered this recipe while watching Martha Stewart.  She had a guest on that was making a Roasted Roma Tomato Lasagna, that I have since made.  The lasagna was consumed in one sitting and everyone was full and happy.   I have to say, I think that the lasagna has become my favorite....it is a meatless wonder!  I will be posting the recipe for the lasagna soon so you too can enjoy the goodness.

In the meantime, please don't deny yourself the yumminess of these roasted tomatoes.  You will thank me for bringing it to your attention!
Enjoy!

Roasted Roma Tomatoes
(original recipe from Martha Stewart)

Ingredients
8 cups Roma or plum tomatoes, halved
1/2 cup sugar
2 tbsp salt
1/2 cup olive oil
1 tbsp pepper, freshly ground prefered
1/2 cup garlic, chopped

Directions
Preheat oven to 375 degrees.  Place ingredients in a large bowl, mix to combine.  Spread tomato mixture evenly on a large baking sheet and transfer to oven.  Bake for 15 to 20 minutes and mash, using a potato masher or back of a spoon.  Return pan to oven and continue to bake until soft and juicy, about 15 to 20 minutes more.

Makes about 6 cups.


Look at those tomatoes....bathing in olive oil, salt and
freshly ground pepper....


Let's not forget that garlic...you can imagine how it is going to carmelize.....


After 20 minutes, they are begging you to mash them and release their juice....


After an additional 20 minutes, you have this most delightful goodness!
Go ahead and sneak a taste...try with a cracker....oh yes...you can thank me now....


Linked To: